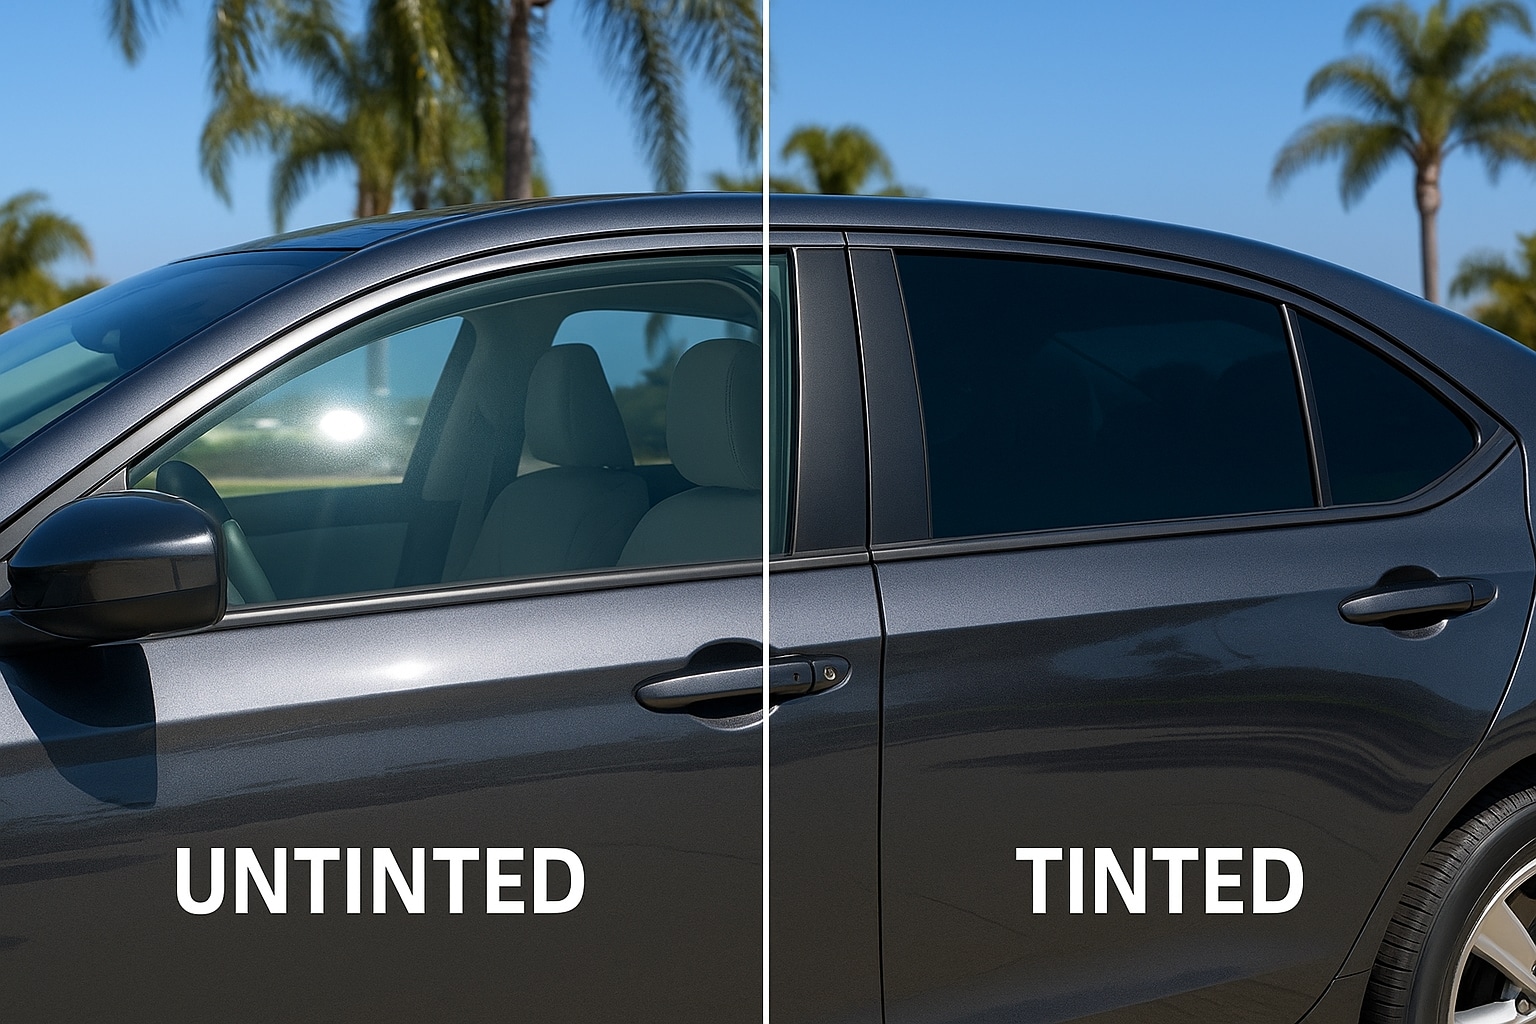
Why Tint Your Car Windows in Southern California?
San Diego and Southern California drivers deal with intense sunshine, glare, and high interior temperatures—sometimes year-round. Tinting your car windows can be a game-changer for:
- UV Protection: Blocks up to 99% of harmful UV rays.
- Heat Reduction: Keeps the cabin cooler.
- Glare Control: Reduces blinding sunlight and headlight glare.
- Privacy: Makes it harder for outsiders to see inside.
- Aesthetics: Gives your vehicle a sleek, custom appearance.
While professional tinting is great, DIY tinting is a cost-effective alternative if done properly.
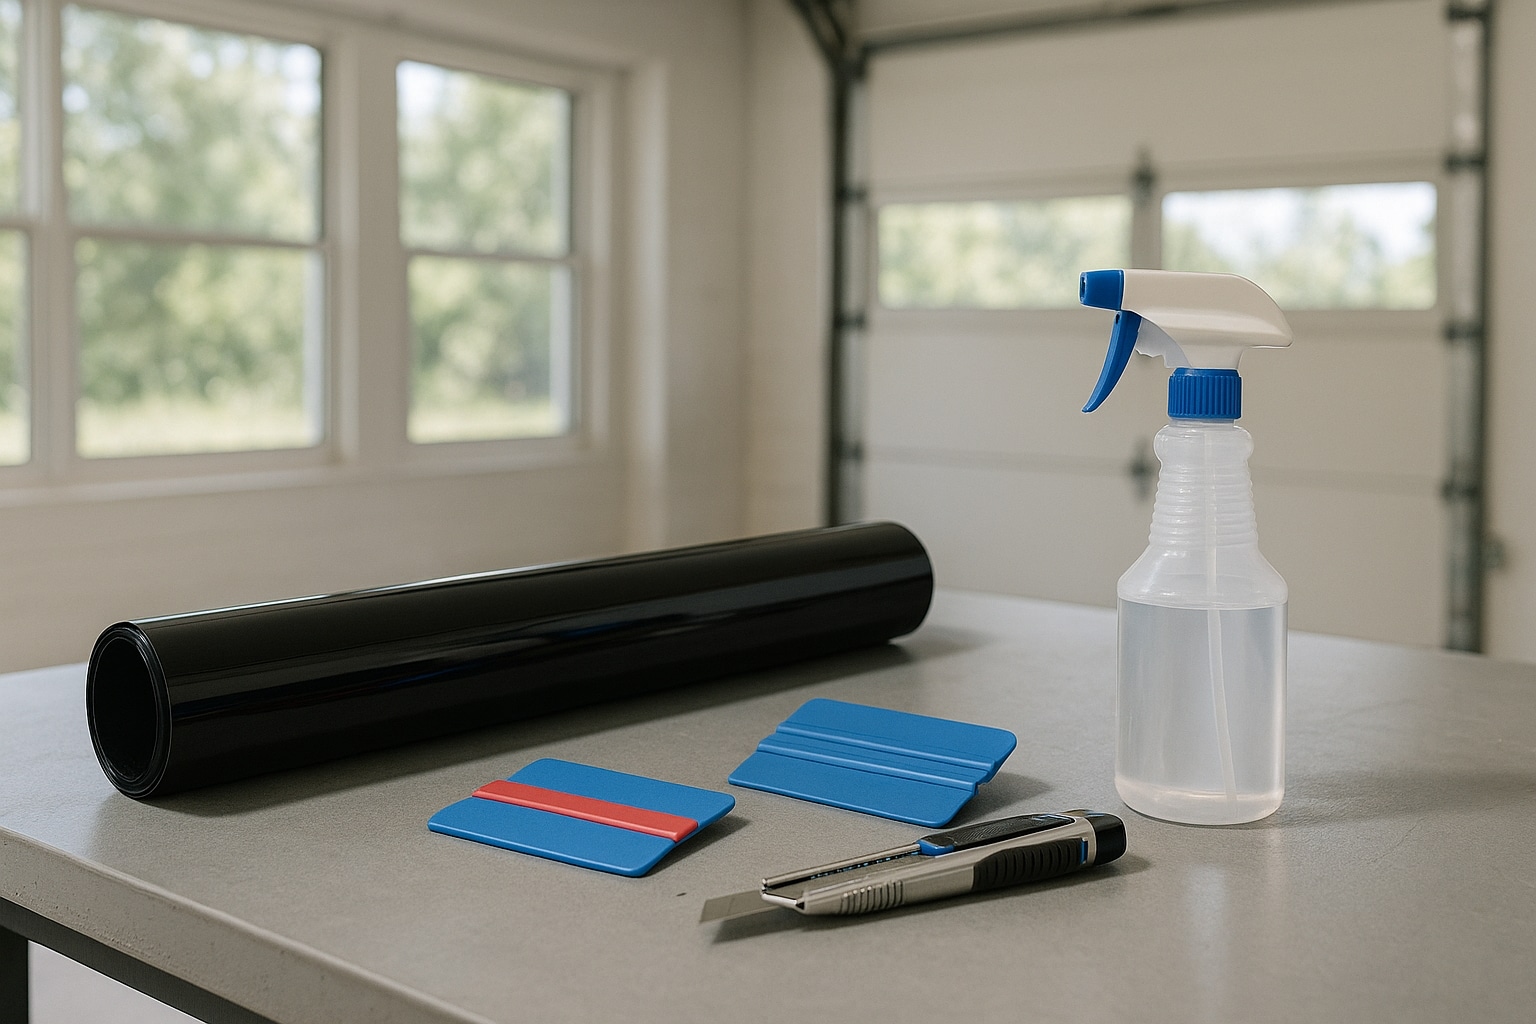
What You’ll Need to Get Started
Before you begin, gather the necessary tools and materials. Here’s your starter kit:
Materials:
- Pre-cut or rolled window tint film (make sure it’s legal in California)
- Application spray (DIY: mix water + a few drops of baby shampoo)
- Squeegee (or a plastic card wrapped in microfiber)
- Utility knife or precision blade
- Heat gun or hair dryer
- Hard card or edge tool
- Window cleaner and lint-free cloth
Pro Tip for San Diego Drivers: Look for ceramic or carbon film for better heat resistance without metallic interference.
Prepping the Car Windows
This step is crucial. A poorly cleaned window will trap dust and bubbles under the film, ruining your tint.
Follow these steps:
- Choose a dust-free location, like a garage or shaded driveway.
- Roll the windows up completely.
- Clean the glass thoroughly using ammonia-free window cleaner and a microfiber cloth.
- Use a razor blade or scraper to remove stubborn grime, adhesive, or stickers.
- Dry with a lint-free towel and ensure no debris remains.
Cleanliness is key—any speck of dust will show up under the film!
Cutting and Shaping the Tint
If you’re not using pre-cut kits, you’ll need to shape the film yourself:
- Spray the outside of the window with application spray.
- Place the film (liner side out) over the window and trim it roughly to size.
- Use a heat gun to shrink and contour the film to the window’s curvature.
- Trim precisely using the window edge as a guide.
- Set the shaped film aside—this will be installed on the inside of the window.
Reminder: California laws typically allow 70% VLT (Visible Light Transmission) or lighter for front side windows. Double-check the regulations before applying.
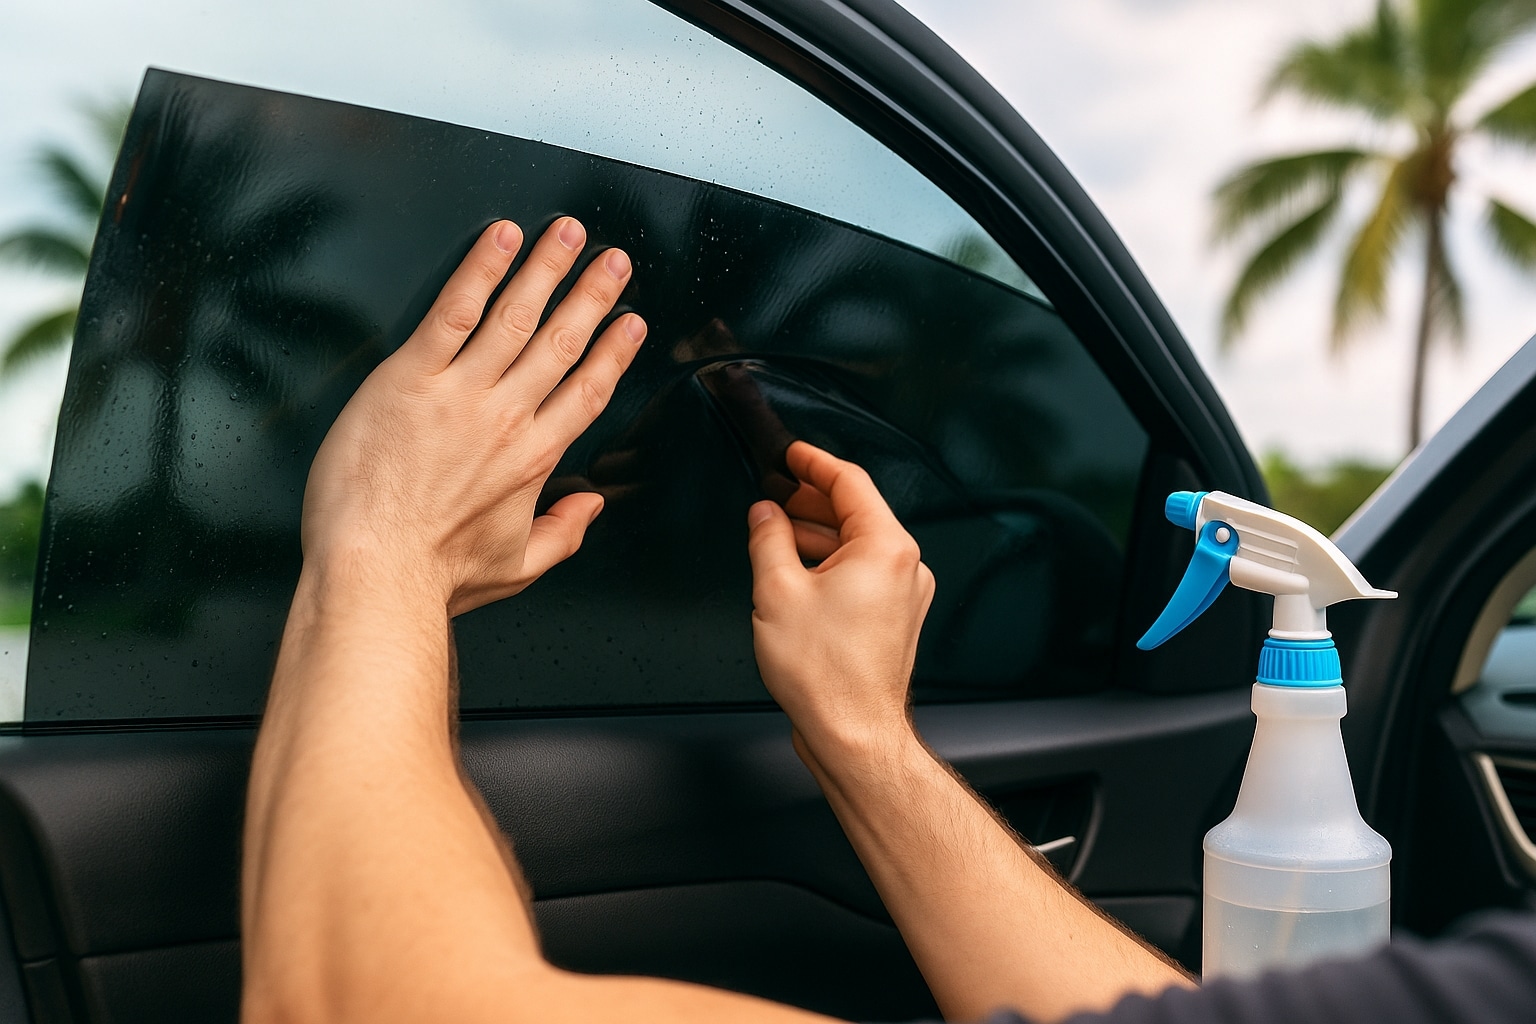
Applying the Tint to Your Windows
Now for the main event—installing the tint on the inside of the window.
Installation Steps:
- Spray the inside of the window generously with your application solution.
- Peel the film liner off slowly while spraying the exposed adhesive.
- Carefully apply the film adhesive-side down onto the wet glass.
- Use a squeegee to press from the center outward, removing air and liquid bubbles.
- Reheat with a heat gun to help the film bond and remove wrinkles.
- Trim excess edges for a perfect fit.
Let the tint dry for 3–5 days before rolling down windows.
Common Mistakes to Avoid
DIY window tinting can go sideways if you skip details. Watch out for these common missteps:
- Tinting in a dirty or windy environment
- Not cleaning the glass thoroughly
- Using poor-quality film
- Applying the tint dry
- Overheating or burning the film with the heat gun
- Not following California tint laws
If the first attempt isn’t perfect, don’t worry—window film is replaceable. Like any DIY skill, it improves with practice.
Should You DIY or Call a Pro?
Doing it yourself can save hundreds of dollars—but it’s labor-intensive and requires patience. If you’re in San Diego or SoCal and want a professional-grade finish with guaranteed legal compliance, it might be worth calling a licensed tinting service.
Still, for car enthusiasts or budget-conscious drivers, DIY window tinting is a satisfying and rewarding project that gives your vehicle a sleek upgrade with practical benefits.