Why You Might Need to Remove Your Window Tint
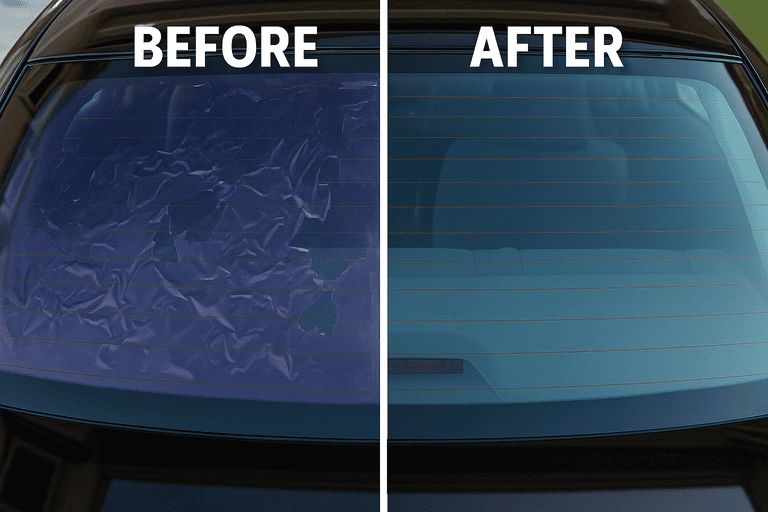
Over time, car window tint can bubble, peel, turn purple, or simply go out of style. Whether you’re prepping your car for resale or just tired of the look, there are several good reasons to remove your old tint:
- Sun damage or fading
- Illegal tint percentages
- Outdated or poor-quality tint
- Hazing or impaired visibility
If you’re in San Diego or Southern California, where the sun is strong year-round, tint degradation happens faster than in other regions. And with California’s strict tint laws, removing and upgrading your film is often necessary to stay legal.
What You’ll Need Before You Start
Removing window tint isn’t just about peeling it off. Doing it right requires patience, the right tools, and some prep.
Basic Tools:
- Heat gun or hairdryer
- Razor blade or plastic scraper
- Spray bottle with soapy water or ammonia
- Microfiber towels
- Garbage bag (black plastic)
- Optional: steamer for larger jobs
Pro tip for Southern Californians: Warm, sunny weather can help soften adhesive, making tint removal easier—just park your car facing the sun and let it heat up for 30 minutes.
Method 1 – The Heat and Peel Technique
This method is best for smaller areas or slightly aged tints.
Step-by-Step:
- Warm the Tint: Use a heat gun or hairdryer to soften the adhesive underneath the tint. Keep it moving in circular motions.
- Peel Slowly: Start at a corner and gently pull the tint away while applying heat. If it resists, reheat the area.
- Remove Residue: Spray the leftover adhesive with soapy water or ammonia and scrape with a plastic razor or towel.
Caution: Avoid using sharp blades near defroster lines on rear windows—damaging those can cost more than a tint job!

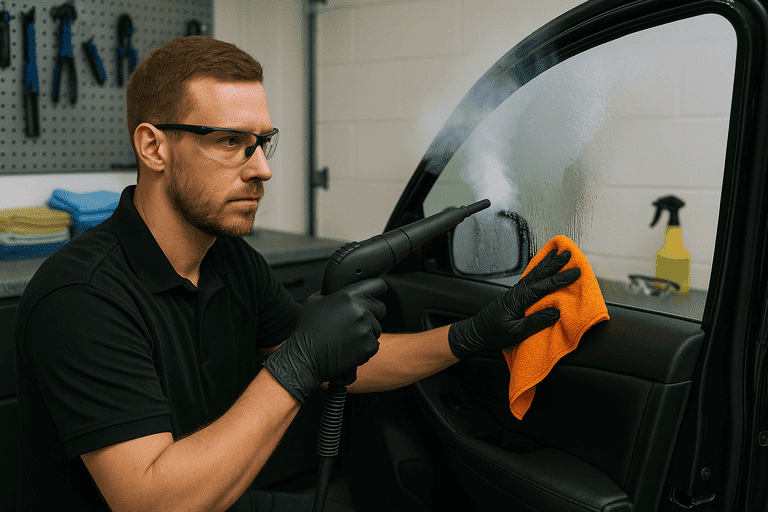
Method 2 – The Steam Method (Best for Full Windows)
If you’re removing tint from multiple windows or rear glass, a clothing steamer works wonders.
How It Works:
- Steam the Glass: Hold the steamer close to the window for several minutes to loosen the glue.
- Peel Carefully: The tint should come off more easily in large pieces.
- Clean Up: Wipe down with ammonia or adhesive remover for a smooth finish.
This method is favored by San Diego auto detailers for its effectiveness and lower risk of scratching glass.
What Not to Do When Removing Tint
Even DIY-friendly tasks have their pitfalls. Here are common mistakes to avoid:
- Skipping surface prep: Cold tint won’t budge easily.
- Using sharp metal razors: They’ll scratch the glass.
- Rushing the job: Impatience leads to tears, adhesive left behind, and frustration.
- Neglecting ventilation: Ammonia-based cleaners should be used in well-aired areas.
If you’re not confident, it’s smart to hire a tint removal service in San Diego. Local pros often bundle removal with new tint installation and proper disposal.
Should You DIY or Call a Pro in San Diego?
If you:
- Only have a couple windows to strip,
- Are comfortable with tools, and
- Have the patience to remove adhesive residue…
…you’ll probably enjoy the satisfaction of a successful DIY job.
But if you’re dealing with:
- Back windows with defroster lines
- Purple bubbling tint
- High-end vehicles
…it’s safer and faster to book a tint removal and re-tint package from a San Diego window tinting expert. Many local shops offer warranties, advanced ceramic films, and same-day service.
Conclusion
Whether you’re aiming for a cleaner look, staying legal, or prepping your ride for resale, knowing how to take tint off car windows is a skill every SoCal car owner might need. Just remember: the right tools and a bit of patience go a long way—or let a San Diego pro handle the job for you.