Why Drivers Remove Tint—and Why It Can Be Tricky
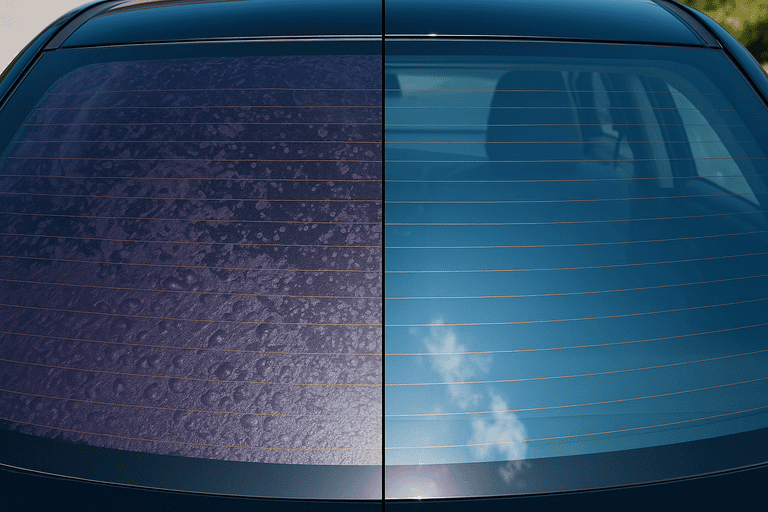
Removing window tint isn’t just about aesthetics. Many San Diego drivers face bubbling, discoloration, or outdated tint jobs that compromise visibility or violate California tint laws. But here’s the catch—do it wrong, and you risk scratching your glass, damaging defroster lines, or leaving behind a gummy mess of adhesive.
Fortunately, there are safe, effective ways to remove tint from car windows. Whether you’re upgrading to ceramic film or prepping your vehicle for resale, knowing how to do it right saves you time, stress, and money.

How Tint Is Applied—And Why Removal Is Tough
To understand how to remove tint, it helps to know how it was installed. Most automotive window tinting consists of two layers:
- The film layer: A thin polyester sheet that gives the tint its color and UV-blocking properties.
- The adhesive layer: A glue-like substance that bonds the film to the glass.
Over time, UV exposure breaks down both layers. The result? Tint that fades, flakes, or fuses stubbornly to the window. This makes removal a bit more complicated than simply peeling off a sticker.
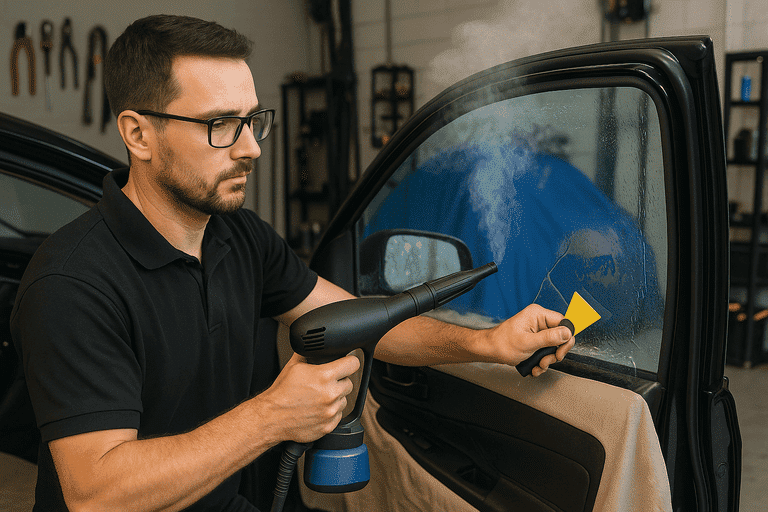
Method 1 – The Heat Gun or Hair Dryer Technique
Best for: Rear and side windows with minimal adhesive residue.
What you’ll need:
- Heat gun or hair dryer
- Razor blade or plastic scraper
- Glass cleaner or isopropyl alcohol
- Microfiber cloths
Steps:
- Warm the tint by running a heat gun or hair dryer about 2–3 inches from the window’s surface. This softens the adhesive.
- Peel a corner gently with a razor blade or your fingernail.
- Slowly remove the film while applying heat. Go slow—rushing could tear the film and leave glue behind.
- Clean any leftover adhesive with isopropyl alcohol and a microfiber cloth.
Pro Tip: Always aim heat from the outside in to avoid damaging defroster lines on rear windows.
Method 2 – The Steam Method (Most Effective for Full Removal)
Best for: Darker tint jobs, especially when paired with heavy adhesive.
What you’ll need:
- Fabric steamer
- Razor blade or scraper
- Ammonia solution (optional for glue removal)
- Garbage bags (optional)
- Paper towels and microfiber cloths
Steps:
- Steam the inside of the glass for 5–10 minutes. Concentrate on one window at a time.
- Test a corner—the tint should peel easily. Use a razor to lift the edge.
- Peel slowly while steaming. Continue to direct steam where tint hasn’t yet been removed.
- Clean the glass thoroughly, using ammonia or a glass-safe adhesive remover for stubborn spots.
Bonus Hack: For added effectiveness, tape a black garbage bag to the outside of the window (on a sunny day) to intensify heat absorption.
Don’ts That Could Damage Your Glass or Defroster
Tint removal seems simple—until you do it wrong. Here are common mistakes that San Diego DIYers make:
- Using metal blades on rear windows. This can permanently scratch glass or destroy defroster lines.
- Skipping adhesive removal. Even if the film comes off, leftover glue can damage new tint or leave smears.
- Rushing the process. Impatience can cause tearing, leaving you with patchy, sticky messes.
- Ignoring legal limits. If you’re reapplying tint, make sure it complies with California’s Vehicle Code § 26708.
If you’re unsure or dealing with old, baked-on tint, it may be best to call a local pro who serves San Diego and Southern California with the right tools and experience.
Section 6: When to Call the Pros—and What to Expect
There’s no shame in letting experts handle it—especially when your rear window has delicate defrost lines or baked-on tint from the early 2000s.
Benefits of professional tint removal:
- Specialized tools and solvents
- Zero risk of glass or defroster damage
- Complete cleanup, no residue
- Quick turnaround
Cost:
Professional tint removal typically costs between $25–$50 per window, depending on condition and vehicle type. Some shops in San Diego offer removal packages bundled with new tint installations.
If you’re upgrading to a high-performance ceramic tint, pro removal is often included at no extra charge.
Final Thoughts
Removing tint from car windows takes time, care, and the right approach—but it’s totally doable with a little patience and preparation. Whether you’re tackling it yourself or booking a San Diego tinting expert, the key is avoiding shortcuts that could cause long-term damage.